5 Steps to Setting Up Your Math Centers
Setting up math centers in your classroom can be overwhelming, stressful, and confusing. I know that I tried (and failed) several times before I found the right combination that worked for me.
Before I started math centers, I had a lot of questions and concerns about how centers would really work in my room.
My Concerns:
1. How can I create meaningful, engaging centers every single week?
2. How can I ensure that the students stay on task?
3. When do I have time to put everything together?
4. How do I organize all the materials needed?
5. How can I differentiate the centers easily for my students?
After beginning centers in my room, I soon discovered that centers are flexible, engaging, rigorous and fun!
What I Discovered:
1. Routines and procedures are crucial.
2. Centers begin to run themselves.
3. I could easily differentiate for my students.
4. I could pull back students who needed more one-on-one attention.
5. Every student can feel successful.
Centers are a powerful way to get students engaged in hands-on activities on their level. It helps them practice the concepts in concrete, representational (also called the pictorial or semi-concrete), and abstract ways.
So now that you’ve decided you are ready to try centers, there are four blog posts that I have written that can help you with everything you need to get centers working in your room. This is the first. Here are the other three:
How to Easily Differentiate Your Math Centers
8 Must-Have Materials for Math Centers
4 Ways to Organize and Store Your Math Center Supplies
This post is all about how to create a vision and a plan for your math centers. Here are 5 steps you can go through to begin setting math centers up in your room.
I also have a webinar that walks you through 6 easy steps to effective math centers in your classroom. Learn how to implement differentiated math centers in your room in an organized and manageable way – absolutely FREE! Learn more here.
Step One: Decide how many centers you feel comfortable with
I’ve seen as many as 10 centers, and as few as three. When it comes to deciding what will work best for you, look at (1) the block of time you have and how much time you want students to spend at each center, and (2) your class size and the ideal group size for your centers.
I decided that I wanted four centers as my kids were already used to this in guided reading. Each center would be 15 minutes long.

This set-up enabled me to pull students back in small groups and work with them on their level. I could review, reteach, guide, or push the groups depending on their needs. Ideally, I would have loved to have a technology station, but my school couldn’t afford enough tablets or computers.
I did my math centers on Fridays during a one-hour time period that we called Power Hour. Some years I had parents or paras to come in and help during this hour, but mostly this was done on my own.
During the week, I did my math lessons that I worked to make as hands-on and engaging as possible. I would start with whole-class instruction and then we had an activity, game, or worksheet. I often used the same activities that we were going to work on during Power Hour on Fridays so that students could get exposure to them. I thought of this time as a modified version of our Friday math centers. During this time, I would also pull kids who needed extra help back with me to work more with manipulatives or to get more practice. I made sure to meet with each student at least once each week.
During Friday’s Power Hour, the activities we did during the week were organized into centers, and were more independently run since students had already had exposure to the activities.
Step Two: Decide what activities and tasks are appropriate for your centers
When deciding what activities and tasks are appropriate for your students, think about what is age-appropriate, how many materials are needed for each center, if your students will have to turn in something from each center they complete, etc.
In my class, I had four centers:
1. With the Teacher:
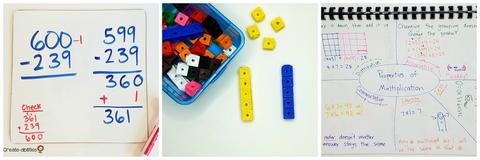
I ability-grouped my students based on district assessments. I pulled the groups back one at a time and worked with them on the concepts we were covering. This really helped me meet the needs of my students. I could pull out manipulatives for students in the concrete stage. I could begin to use pictures for the representational stage. I could use numbers and equations for the abstract stage. It was a great time to go through problems and fill out their math journals.
2. At Their Seat:
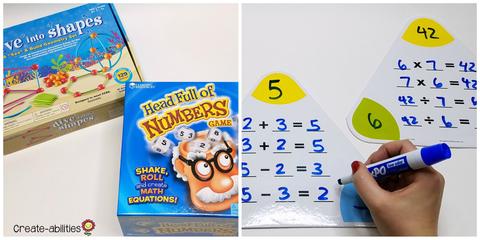
When students worked at their seats, they used that time to practice flashcards, finish any worksheets/problems they hadn’t finished, or play math games. I loved using these triangle flashcards because the students could write on them with dry erase markers and use them again and again. They also enjoyed playing with some math games I had accumulated when they were finished with everything else. Not only did it give them a little brain break, they were able to practice or review skills while playing. That’s what I call a win-win!
(You can find the two games pictured below here: Dive Into Shapes and Head Full of Numbers)
3. and 4. Games and Activities:
I was lucky enough to have two large tables in my room. Students would work there (or sometimes at a place of their choosing like the floor or beanbags) to work on the next two centers. Students would work individually or in small groups to play math games, solve math puzzles/riddles, complete math tasks, and more. It was a great way to let them practice and review the concepts we had talked about during the week. Most games had an accountability factor in there that was some type of recording sheet. I would also observe the kids from my position and redirect as needed.
Step Three: Prepare the materials ahead of time
Properly setting your room up for centers takes time, so the most important part of preparing your centers is that you give yourself that time. The last thing you want to do is prepare your materials 10 minutes before centers begin. You’ll start late, key elements of your centers will be missing, and overall, it will be less productive time for you and your students.
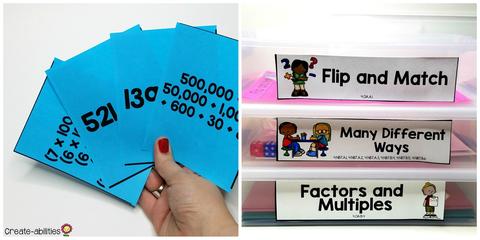
When setting things up, use bins and file folders to keep things organized at every center. Also keep any manipulatives the kids will need in a central location.
If you’re looking for centers that you can do in your room, I sell print-and-go centers for grades K-5 so you don’t have to worry about coming up with the activities and materials all on your own. Browse Our Centers Here
Step Four: Create flexible groups for your students
It’s generally best to group students based on their ability so that the discussions and activities are based on their zones of proximal development. It’s also important to make these groups flexible – something that can change throughout the year. Just because a student is low in measurement does not mean that they will be low in geometry.
To learn more about this, make sure you read the next blog post in the series, How to Easily Differentiate Your Math Centers
Step Five: Make it work for you
This just comes down to trial and error. The best piece of advice I can give you about setting up centers is to create a vision or plan for your room. After you decide what may work for you, try it out in your room. Tweak things as you go and change it up until it fits your style and your vision. I promise you, once you start centers, you won’t want to go back.
PEACE, LOVE, AND STICKY NOTES,

**Disclosure: Some links in this content may be affiliate links, which means that I may get a commission if you decide to purchase anything. I sometimes use affiliate links in my free content to help support my efforts to bring you quality ideas and resources. You will not pay more when buying a product through my link. In fact, in some cases, you may be paying less! I only recommend products that I use and love myself, so I know you’ll be in good hands.**
Blog Categories
Meet the author


