5 Ways to Make Fractions FUN
Fractions can be a tricky concept for students. There are things that seem “backwards” and confusing. Take, for example, this list of fractions: 1/2, 1/4, 1/6. Which fraction is the smallest? The one with the BIGGEST denominator! That can really confuse some of our kiddos.
At first, the idea of teaching fractions scared me. However, I began to learn that teaching fractions can actually be a lot of fun! Here are 5 tips and tricks that I’ve used to help make fractions easier to understand.
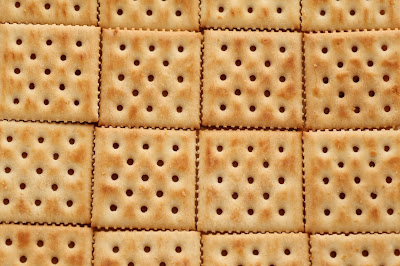
1. Fractions and Food: Make fractions familiar. Kids have been working with fractions their entire lives, they just might not know it yet. I made them familiar by connecting them to food. Of course you can tie it in to pizza (or a Hershey’s candy bar if you have this book). I wanted to do something that was hands-on and that my kids could enjoy eating *afterwards. My teaching partner had the fabulous idea to use cheese crackers, graham crackers, and saltines. For example, four cheese crackers fit nicely onto a saltine. You can also use Chex Mix which gives a different sized square. Make sure that the type of crackers you buy fit together or it can be frustrating for some kids. Not every cheese cracker will fit with a saltine or graham cracker.
(p.s. These can also be used when teaching area and perimeter. Plus, you get to eat the extras!)
2. Interactive Number Line: I’ll be honest, I was terrified when I saw how much fractions and number lines were taught together in the CCSS. I was worried that adding fractions to number lines would just be one more thing my kids had to decode. Because of this, and my belief that fraction lessons should be as hands-on as possible, I used an interactive number line.
I taped mine to a wall in these pictures so you could see the fractions better, but normally I have a student hold the rope at each end. We used a rope but you could also use a long jump rope or twine.
We started very basic with the concept of zero and one. We talked repeatedly about how this line represented one whole. From there, we brought in the idea of half. We would model where a half was and where it wasn’t. Then, I would hand a student a clothes pin and they would pin the fraction in the correct spot. As with everything, we modeled, modeled, modeled. We talked about equal parts and the meaning of the numerator and denominator.
From there, you can begin to bring in other fractions.
Having something hanging in front of my kids, that they could physically walk up to and place the fraction on was huge!! I saw so many “ah-ha” moments when doing this. We would talk about what the numerators and denominators really mean. Then, the kids would get to walk up and determine where to place the fractions.
This was also an easy way to bring up and practice equivalent fractions when we were to that point. They could see that 4/4 is the same as 1 whole because they land at the same spot on the number line.
As your class gets more and more comfortable with this, over multiple exposures, you can add in fractions to compare and order. My teaching partner had colored plastic clothes pins. We would use blue clothes pins for fourths, red clothes pins for thirds, etc. Not critical, but another way to reinforce the difference in the sizes of fractions. This can be powerful when students have to order fractions. I had many, many kids draw number lines on the test to help them figure out how to order fractions.
If you want a copy of the fractions I used, you can grab them here. I only went up through eighths because that’s as high as I needed to go in third. Also, if you go too high, you start getting too many fractions on the number line and it looks cluttered and confusing. If you want to make your own, I used Kimberly Gewein’s Traditional Fractions Font which is FREE for personal use!
After practicing it this way, I created a concrete page for my kids to practice with.
It’s a forever FREEBIE that you can find by clicking on the link or the picture. FREE Fractions and Number Lines.
3. Fractions Little Book: Again, I’m a huge fan of hands-on. I have created a series of Little Books that I used in my room for review and practice. I seriously love them and so did my kids. I created one for fractions and it worked so well. It started at basic fractions and worked it’s way up to harder concepts.
I really liked how I could pick and choose what pages to include in the book. If I had a class (or a student) that could be pushed further, I could add in the pages on multiplying fractions and it worked great. We would go over the books together and do a page or two at a time. The kids would keep them in their folders at their desks and pull them out for review. Have I mentioned how much I seriously love Little Books?
You can purchase my Fractions Little Book here.
4. Games and Centers: I created two games that are a great way to practice recognizing and understanding fractions. This was also a good way for my kids to really understand what a numerator was and what a denominator was.
The first is called Spill and Write. You can download this game for FREE here. It’s pretty self-explanatory.
I used the two-sided counters that have a different color on each side. The kids shook them in their hands and “spilled” them onto their desk. Then, they would record what they spilled. I got the idea to use a shortened ten frame for them to color in to help them see how two parts made the whole.
The second game is Write It Out which you can also get for FREE here. Similar to the first, kids shake two-sided counters and color and write what they shook.
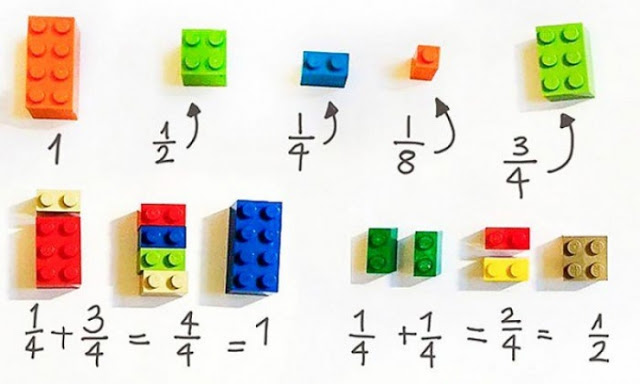
5. Lego’s: Now I must admit that I have never personally used Lego’s for teaching fractions. However, I have talked to several awesome teachers that highly recommend it. Did you know that Lego has an education branch that creates curriculum, activities, and trains teachers? I sure didn’t but it looks really fun. You can find out more about it here.
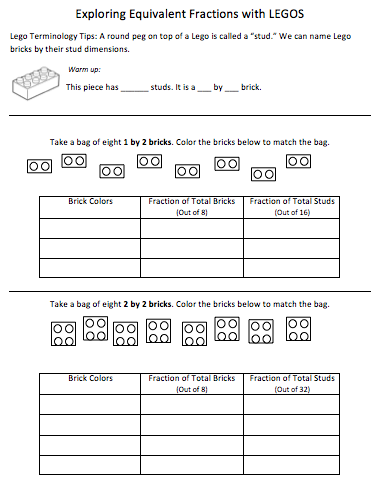
Scholastic has created several lessons on using Lego’s to teach fractions that are really good. They also include a few FREEBIES like the one below, that go with the lessons.
If you haven’t seen these lessons, you should really check them out. You can see more information on this blog where a 3rd grade teacher explains how she used Scholastic’s lesson to teach her kids.
Enjoy!
PEACE, LOVE, AND STICKY NOTES

Blog Categories
Meet the author


